
My practice is based around digital and analogue film processing though normally the analogue process stops after the film has been developed as it is scanned and the remainder of the workflow follows a digital path up to the point of printing which currently is inkjet based.
I have printed images in the past but that was when I was a child and only 35mm film. Today I decided to use a 120 film negative and print on 10×8 pearl paper.
Put the 75mm lens in the enlarger loaded the selected negative into the holder with the aperture wide open to check focus. Then it was time to run test strips to determine the correct exposure time for the negative.
The initial exposure setting was at f8 with 5 seconds exposure then 3 seconds for each strip. The contrast was set to 3.

The image was overexposed and therefore a second test strip was necessary to go lighter and crate a good exposure across the complete tonal range. Ansel Adams developed the zonal system to aid the correct exposure of film and development of prints(En.wikipedia.org, 2018)
The second test strip was done using an an aperture setting of F11 on the enlarger and the strip contained the correct exposure around the middle of the strip which equate to 11 seconds with a contrast setting of 3. After discussing the test strip with Steph Cosgrove who along with Paul Clements were providing guidance in the darkroom we decided to print a full size image but split process the image to add more punch to the blacks. The suggested exposure setting was 11 seconds with a contrast of 4 followed by a second exposure for 3.5 seconds at contrast of 5 to give well balanced exposure.

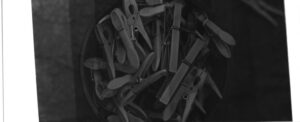
This image was slightly damaged due to the tongs on the print while it was either in the developer or fixer.
The final image had good contrast and punch in the blacks the framing of the image was done to mimic a polaroid image with a bigger border at the bottom of the image.
The use of resin based paper required a developing time of 1 minute with 10 seconds in the fixer followed by two minutes in the wash. The image was then put through a dryer before inspecting the final result.
I did experiment with dodging a burning the image however the results were not very conclusive and is a case of more practice in the darkroom. The image also would have benefitted from some touchup work to remove the odd white spots present on the image cause either by dust on the negative or on the paper prior to exposure. I did try to take care with removing all dust from the paper prior to exposure as you can experience similar problems if you have dust on prints when printing on an inkjet printer.
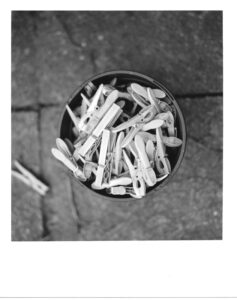
I did print a second image using the same exposure settings as the first as both images were shot in the same day with the same type of settings.
The experience of being in a darkroom was enjoyable and the overall principles are similar to the ones used in my digital workflow however working digitally I do not have to worry about the safe working with chemicals which required us to use lab coats, goggles and gloves when developing the prints.
NB. Light sources other than the safety light can fog the prints and therefore it is advisable to cover up or remove modern digital watches or smartphones which emit white light.
References
- En.wikipedia.org. (2018). Zone System. [online] Available at: https://en.wikipedia.org/wiki/Zone_System [Accessed 25 Feb. 2018].